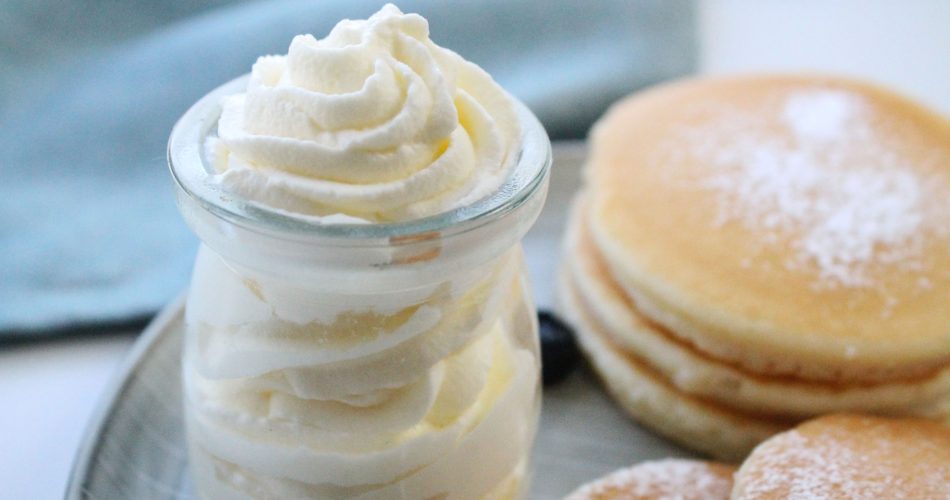
Did you know that you can make Homemade whipped cream with just one ingredient? It is incredibly versatile and easy to prepare. This delicious whipped frosting can be served as is or used as a base ingredient, sweetened and flavoured to suit absolutely any dessert.
Soft, light and fluffy, and taking 5 minutes to whip, your ultimate go to recipe for topping fruit, piped on cakes or scooped onto beverages.
With my easy-to-follow steps and tips on flavourings storing leftover whipped cream, flavourings and much more, you too can create incredible frosting for your desserts.
Ingredients

Since cream is the base and most important ingredient in making this recipe, it’s important to understand the fat content in the type of cream you are using for the result you wish to achieve.
In your grocery store, you might find cartons of cream typically labelled as heavy or double cream, whipping cream or single cream. These can sometimes be overwhelming and confusing when selecting the correct cream for your recipe.
Here I will help you choose the cream from your store that will whip up to perfection every time.
Choosing your cream
Each type of cream has a specific fat content. The fat content affects the texture of the whipped cream.
- Heavy or double cream: Heavy whipping cream is used in this recipe: With approximately 48% fat content, heavy whipping cream has a rich, creamy texture. It whips up very well, producing stable, stiff peaks. When whipped and piped, it holds its shape up to 48 hours when refrigerated.
- Whipping cream: Can be used in this recipe as an alternative to heavy or double cream if you want to achieve soft peaks with an airy texture. Whipping cream contains approximately 35% milkfat. It whips well, and produces a light and airy texture, with soft peaks perfect for topping on fruit or light cake decorations.
- Single cream: Not suitable for whipping or for this recipe because of its low-fat content. Single cream also referred to as pouring cream contains approximately 18% of milk fat. This type of cream is usually poured into beverages or sauces. With its low-fat content, you will not be able to whip single cream.
- Flavouring and extract: Flavouring and extract is optional and can be added to suit any dessert or beverage. You can read on the different flavouring and extract ideas in the tips and frequently asked questions section below.
Equipment

- An electric or stand mixer or a balloon whisk, except you need to adjust the timings depending on which method you use. Whipping the cream with a balloon whisk might take a few minutes longer compared to an electric or stand mixer.
- A large bowl, preferably metal or glass, which retains colder temperatures better than plastic.
- Measuring cup, spoons or a kitchen scale
How to make Homemade Whipped Cream
- Start with chilled cream straight out of the refrigerator for maximum volume and the best texture.
- Just pop the bowl and whisk or beaters in the freezer for 10-15 minutes before starting.
- Add the cold whipping cream to the bowl.

- If you are using a stand or electric mixer, turn it on to a low setting to start beating.
- As the cream begins to thicken turn up the speed to a medium setting and beat until the cream reaches the desired consistency.
- For soft peaks: Beat for about 3-4 minutes on medium speed until the cream forms soft peaks. When you lift up the beaters the cream holds its shape except that the tip of the peak curls over on itself. This consistency is perfect for scooping over pancakes, fruit, coffee, mousse or pies.

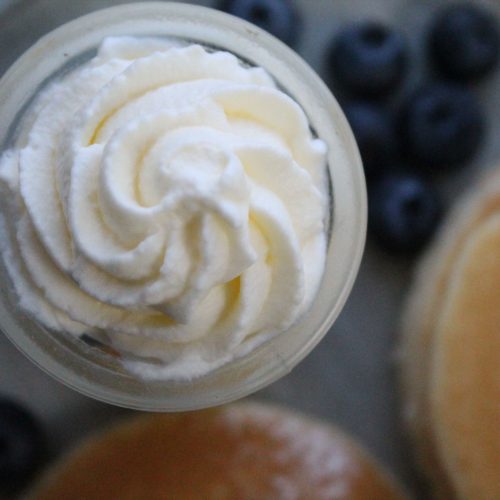
- After about another minute of beating, stiff peaks form. The beaters or whisk leaves distinct tracks/lines in the cream while beating. You will also notice stiff peaks when the beaters are lifted off the cream. This is a great consistency for sandwiching sponge cakes. The firm consistency also makes stiffly beaten cream perfect for decorative piping. The piped cream holds it shape with the defined and decorative piping

- Stop beating the cream immediately as it reaches this stage. Overbeating beyond this stage will cause the cream to become grainy and separate into liquid and curdled solid pieces. At this stage, the cream is unusable for spreading or piping.
FAQ & Tips

How much whipped cream will heavy cream make?
Make sure that you use a large bowl when whipping cream. It whipsup to at least 2 times its volume and splatters while being whipped. So,one cup cream will yield about 2 cups whipped cream.
How to flavour or sweeten whipped cream
Whipped cream usually accompanies desserts, fruit, beverages or pancakes. These desserts are already sweet. You want your homemade whipped cream to compliment, not compete in sweetness with the dessert.
A tablespoon of sugar per cup of cream is ideal to sweeten your homemade whipped cream when serving with a sweet flavoured dessert.
Besides adding sugar, the cream can be flavoured to suit a special recipe creating unique taste.
Some of the flavourings that are great to use, include extracts, zest of citrus fruit, coffee, liqueur, and cocoa or chocolate
See our favorite flavored whipped cream recipes here:
- Lemon whipped cream
- Chocolate whipped cream
- Strawberry whipped cream
- Cinnamon whipped cream
- Vegan whipped cream
- Caramel whipped cream
How long to beat whipped cream?
As you whip the cream, you’ll notice that the beaters leave trails in the cream and it begins to thickens
About 4 minutes after beating soft peaks form. When you lift up the beaters the cream holds its shape except that the tip of the peak curls over on itself.

After about another minute of beating, stiff peaks form and the mixture thickens even more. When you lift the beaters, the peaks stand straight up. Stop whipping once the cream reaches the stiff peak stage.

Whipping the cream past the stiff peak stage produces a grainy or curdled texture. Besides the texture, the flavour is also negatively impacted. The cream is not usable for piping, filling or scooping at this stage.

What is the best way to store leftover whipped cream?
When leftover cream is stored in a container in the refrigerator you will notice water has settled beneath the whipped cream over time. This occurs when the cream starts to deflate.
Here is a great way to store your leftover whipped cream for up to 48 hours without it mixing with the water and deflating
Place a fine mesh sieve over a bowl or jug.
A cheesecloth or a paper towel can be used to line the sieve if the holes are too large to hold the whipped cream.
Scoop your leftover whipped cream into the sieve.

The sieve will hold the whipped cream, while the water will drain out into the bowl or jug.

When you are ready to use the whipped cream, simply tip the sieve holding the cream into a dry bowl and use as needed.

Homemade Whipped Cream
Equipment
- An electric or stand mixer (or balloon whisk).
- A large bowl. Preferably metal or glass
Ingredients
- 1cup/ 250ml cold heavy or whipping cream see note 1
- Flavourings and sweetener (optional) see note 2
Instructions
- Chill the bowl in the refrigerator for about 10 minutes before using
- Pour the cream into the chilled bowl. Add in any flavourings or sweetener now if using
- If you are using a stand or electric mixer, turn it on to a low setting to start beating.
- As the cream begins to thicken turn up the speed to a medium setting and beat until the cream reaches the desired consistency.
- About 4 minutes after beating soft peaks form. When you lift up the beaters the cream holds its shape except that the tip of the peak curls over on itself. This consistency is perfect for scooping over pancakes, fruit, coffee, mousse or pies.
- After about another minute of beating, stiff peaks form and the mixture thickens even more.When you lift up the beaters, the peaks stand straight up. The firm consistency also makes stiffly beaten cream perfect for decorative piping.
- Stop beating the cream immediately when it reaches this stage. See note 3
- Use the cream shortly after whipping: Use the cream shortly after whipping or see post above for the best and more detailed suggestion when storing whipped cream.
- Avoid leaving the whipped cream at room temperature for long periods of time. Warm cream deflates quickly and can turn watery.
Notes
- Depending on how you decide to serve whipped cream, you can use either whipping cream or heavy (also referred to as double cream) to make whipped cream. However, heavy cream produces a sturdier whipped cream that can hold peaks, while whipping cream produces a softer and airier texture that doesn’t hold peaks as stiffly.
- Whipped cream usually accompanies desserts, fruit, beverages or pancakes. These desserts are already sweet. You want your homemade whipped cream to compliment, not compete in sweetness with the dessert. A tablespoon of sugar per cup of cream is ideal to sweeten your homemade whipped cream when serving with a sweet flavoured dessert. Besides adding sugar to homemade whipped cream can be flavoured to suit a special recipe creating unique taste. Some of the flavourings that are great to use, include extracts, zest of citrus fruit, coffee, liqueur, and cocoa or chocolate
- Whipping the cream past the stiff peak stage produces a grainy or curdled texture. Besides the texture, the flavour is also negatively impacted. The cream is not usable for piping, filling or scooping at this stage.